Setting up WordPress on localhost is the smartest and safest way to build, test, and practice website development without buying hosting or a domain. Whether you’re a beginner learning WordPress, a developer creating client websites, or a designer testing themes and plugins, installing WordPress locally gives you full control and flexibility right on your computer — no internet connection required.
In this guide, you will learnhow to setup WordPress on localhost step-by-stepusing popular tools like XAMPP or WAMP. We will walk through everything — downloading WordPress, creating a local database, configuring your site, and accessing your local dashboard just like a real website online. By the end, you’ll have your own private WordPress environment ready for development and testing.
Let’s get started with the easiest and most beginner-friendly method tosetup WordPress on localhostin just a few minutes.
Content
How to Setup WordPress in Localhost (Step-by-Step Guide for Beginners)
What Is Localhost? Why Use It for WordPress Development?
When we say localhost, we mean your own computer acting like a web server (rather than hosting your site on the internet). Setting up WordPress locally means you’re building and testing your website offline, in a private environment.
Benefits of Setting Up WordPress on Localhost
You can experiment safely with themes, plugins and configurations without affecting a live site. WPZOOM+1
It’s typically faster because everything is running on your machine (no network latency).
Useful for learning, prototyping or preparing a site before pushing it live.
You can work offline or in restricted-connectivity environments.
System Requirements Before Installing WordPress Locally
To run WordPress on localhost, you’ll need:
A web server environment (Apache or Nginx)
PHP (the version supported by WordPress)
MySQL or MariaDB database
Your OS: Windows, macOS or Linux Many “local server” packages (like XAMPP, WAMP, MAMP) bundle these together.
Download Required Tools to Install WordPress on Localhost
Download XAMPP / WAMP / MAMP
Choose the appropriate local server package for your operating system:
XAMPP: Works on Windows, macOS, Linux
WAMP: Windows only
MAMP: macOS (also Windows version) Install the package, start the server modules (Apache & MySQL) and verify they’re running. Themeisle+2Local+2
Download Latest WordPress Version
Go to the official WordPress site and download the latest stable release. Extract the files to your local server’s “htdocs” or equivalent folder. wedevs.com+1
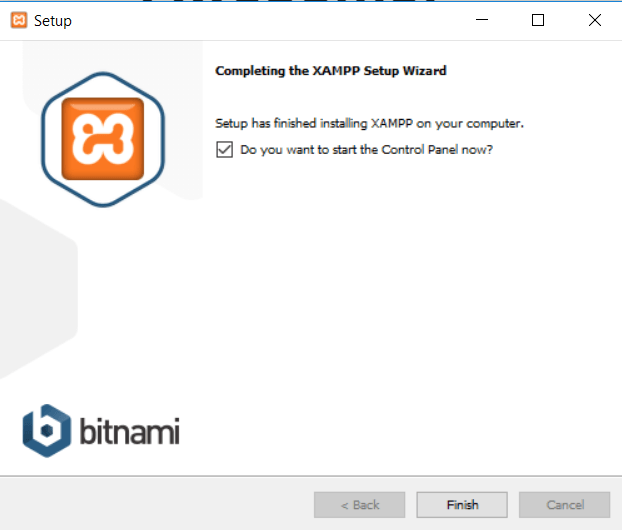
Step-by-Step Guide to Install XAMPP (or WAMP/MAMP) on Your PC
Download the installer from the official website of XAMPP, WAMP or MAMP.
Run the installer and follow the prompts. On Windows, you may see firewall notifications—allow access. Local
Once installed, open the control panel and start Apache and MySQL modules. If both show green / running status, you’re set.
To test the server, open your browser and type http://localhost. You should see a “It works!” screen or the local server’s dashboard.
If errors occur (e.g., port 80 in use, Apache failing to start), check firewall, or change the port in configuration (for advanced user). WPExperts+1
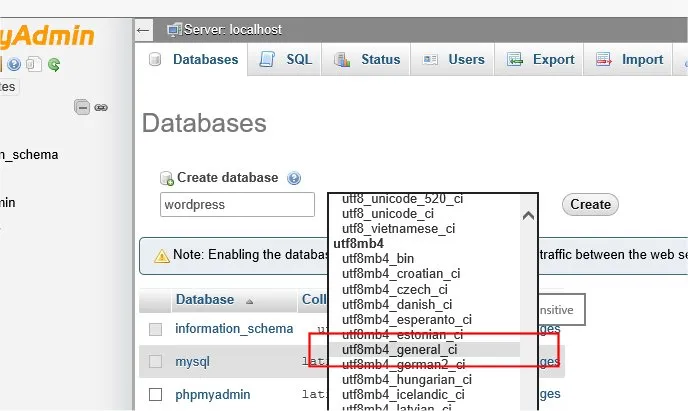
How to Create a Database for WordPress in phpMyAdmin
Create a New Database
Open your browser and navigate to http://localhost/phpmyadmin.
Click on Databases tab → type a database name (e.g., wordpress_local) → choose collation utf8_unicode_ci → click Create.
Setup Database User & Password (Optional)
In many local setups, default user is root with no password (especially on XAMPP) — fine for localhost only. If you prefer stronger setup, create a new user and assign permissions.
Install WordPress on Localhost
Extract WordPress Files
Extract the downloaded WordPress zip file and move its folder into your local server’s “htdocs” (Windows) or equivalent directory. For example: C:\xampp\htdocs\mywordsite.
Move Files to htdocs Folder
Rename folder as desired (e.g., my-site, devsite). Then you will access via http://localhost/my-site/.
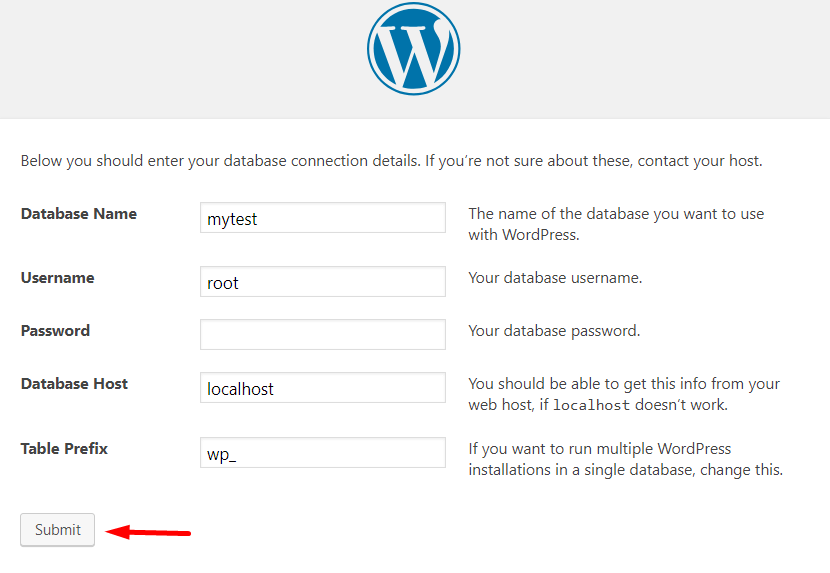
Configure wp-config.php File
When you navigate to your folder in browser, WordPress will prompt to create a wp-config.php. You’ll need to enter:
Database name
Database user (‘root’ by default)
Password (blank by default)
Database host (‘localhost’)
Table prefix (default wp_)
Run WordPress Installation Wizard
Open http://localhost/your-folder‐name/ in browser.
Select your language.
Fill in site title, admin username, password, email.
Complete installation and log into dashboard: http://localhost/your‐folder/wp‐admin.
Login to Your WordPress Dashboard Locally
Once installation completes, use the credentials you created to login to http://localhost/yourfolder/wp-admin. You’ll see the familiar WordPress dashboard. From here you can install themes, plugins, create pages/posts — just like on a live site, but offline.
Common Issues & How to Fix Them
Apache/MySQL Not Starting
Ensure no other program is using port 80 (Skype, other servers).
Change Apache port to 8080 or something else via config if needed.
Check firewall or antivirus blocking service. WPExperts
Database Connection Error
Verify database name, user, password in wp-config.php.
Use correct URL (e.g., http://localhost/my-site/).
Check your computer’s network/security settings.
Difference Between Localhost and Live Hosting
While installing on localhost is great for development/testing, there are key differences when you move to a live hosting environment:
On live hosting your site is publicly accessible via domain name.
Live hosting has external visitor traffic, security, backups, SSL certificates.
Performance considerations: shared servers vs local machine resources.
On live you must handle real domain, DNS, hosting provider, uptime. Using localhost lets you experiment privately; however when you’re ready, you’ll need to “go live”.
How to Move Your Local WordPress Site to Live Hosting Later
When your local site is ready for the world, here is a basic outline to migrate:
Choose a web host and domain name.
Export local database (via phpMyAdmin) and copy all WordPress files.
On your live host create a database and import the export file.
Upload WordPress files to live server root.
Update wp-config.php on live server with live database credentials.
Search & replace URLs in database (from localhost/your-folder to yourdomain.com).
Log into your live site and update permalinks.
Test everything (links, images, plugins, forms). Many tutorials offered this exact workflow.
FAQs About Installing WordPress in Localhost
Q1: Is localhost setup free?
Yes, using tools like XAMPP/WAMP/MAMP and WordPress you can build a local site at zero hosting cost.
Q2: Can I install themes/plugins in a localhost WordPress? Absolutely. Localhost acts just like a normal WordPress install; you can install any theme or plugin and test safely.
Q3: Will my local WordPress site be visible to internet? By default no — only your machine sees it. If you want to share externally you’d need to configure additional networking or host live.
Q4: Is database security important locally? Less critical for a purely local environment, but still good practice to use strong credentials if you may open local site to network.
Q5: Can I develop offline? Yes — one of the major benefits of localhost is you can work without being connected to the internet.
Final Thoughts & Next Steps
Setting up WordPress in localhost is an excellent and free way to learn, experiment and prepare your website before going live. Follow the steps above download your local server, set up the database, install WordPress, login, and begin building.
Once comfortable, consider migrating your local site to a live hosting environment and sharing your work with the world. If you face any issues during the process, refer to the common troubleshooting section or explore the many free tutorials available.
Good luck building your site enjoy the freedom of local development!